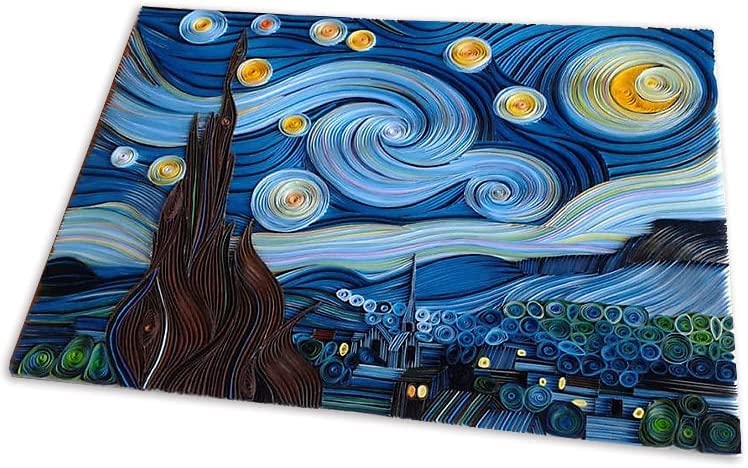
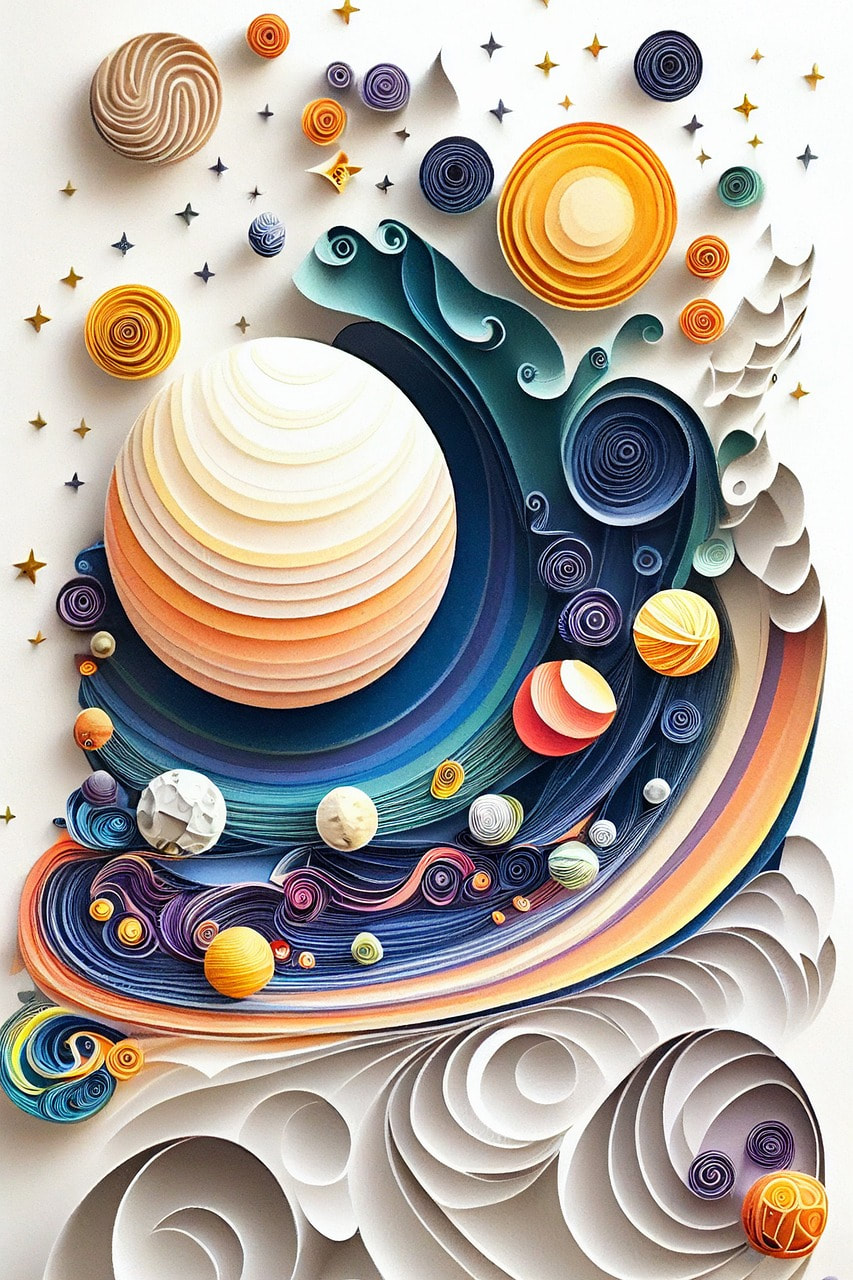
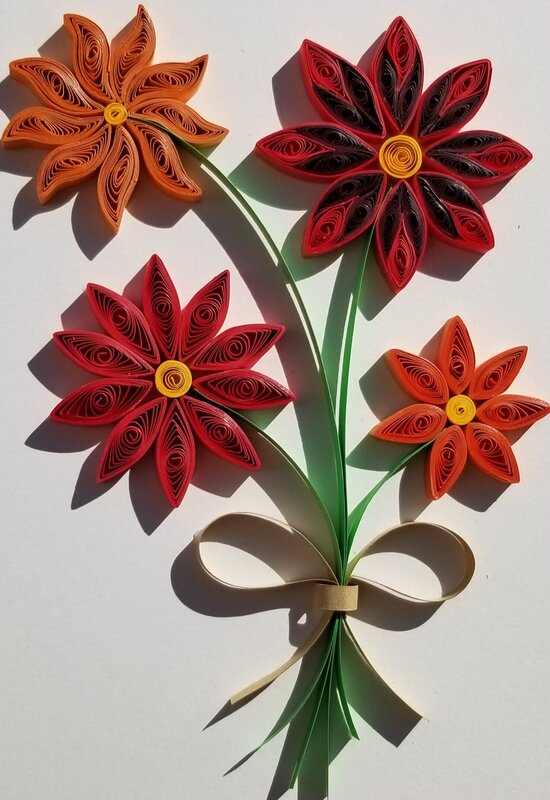
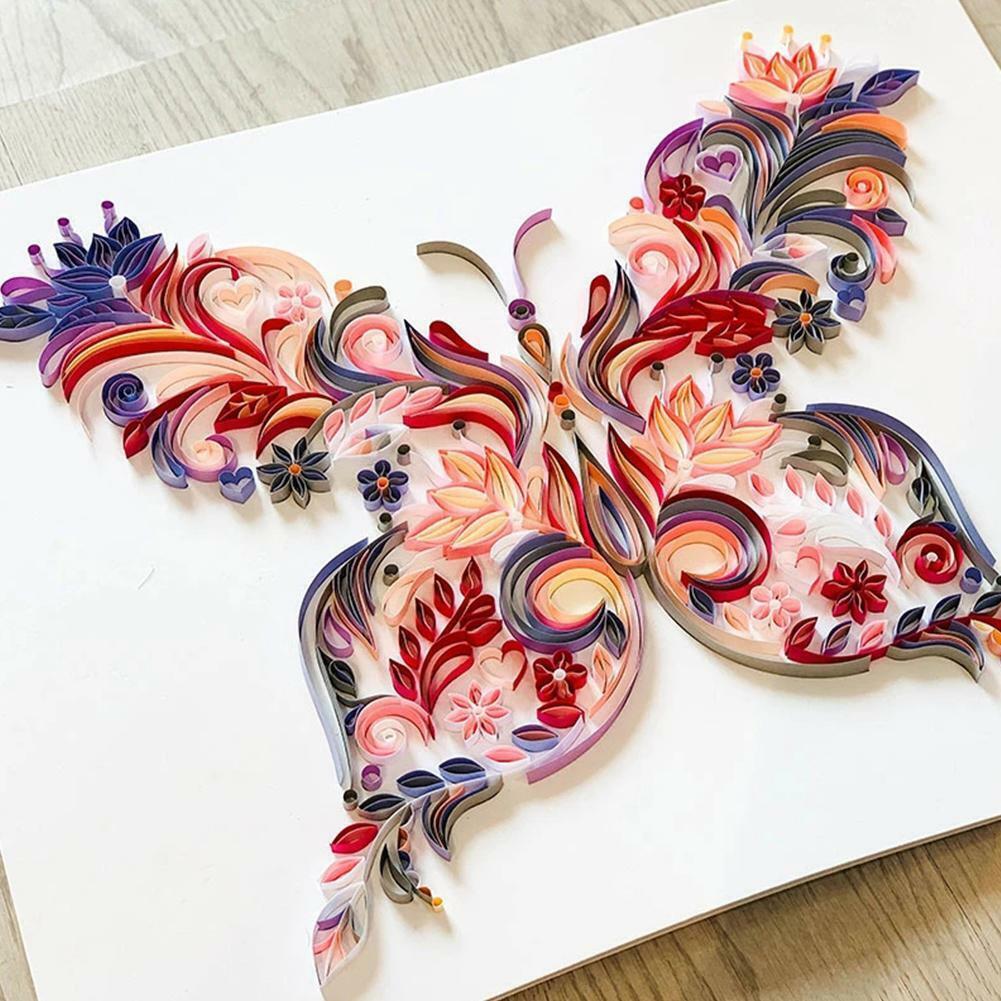
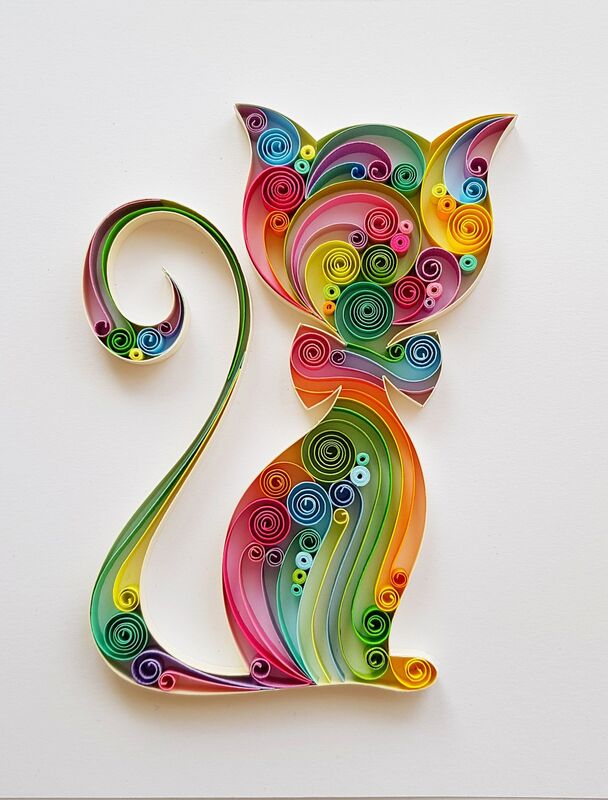
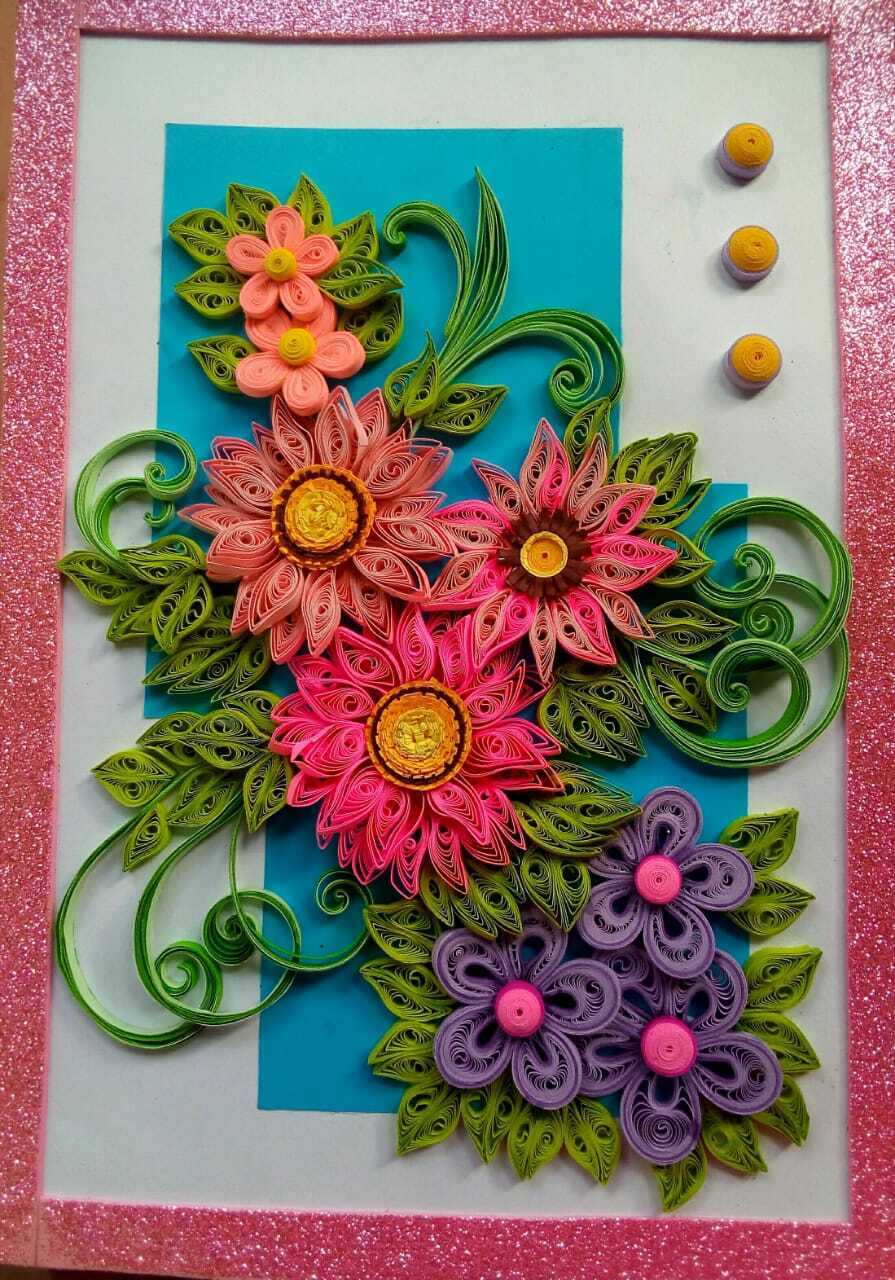
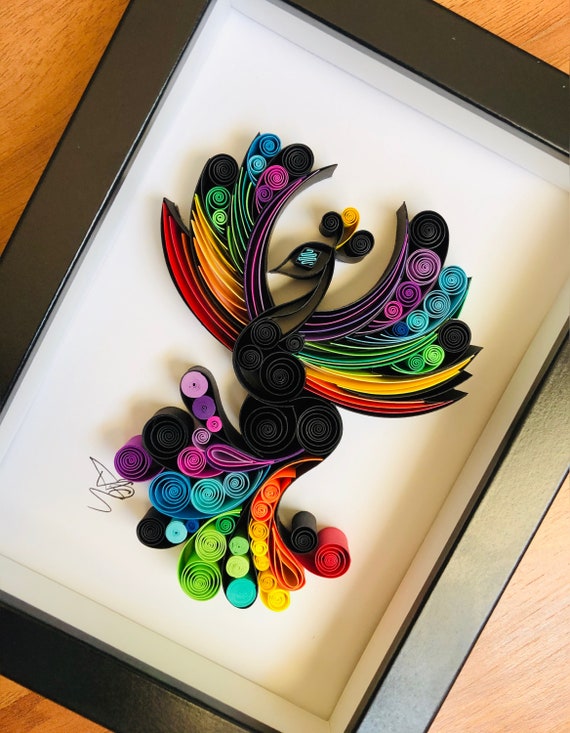
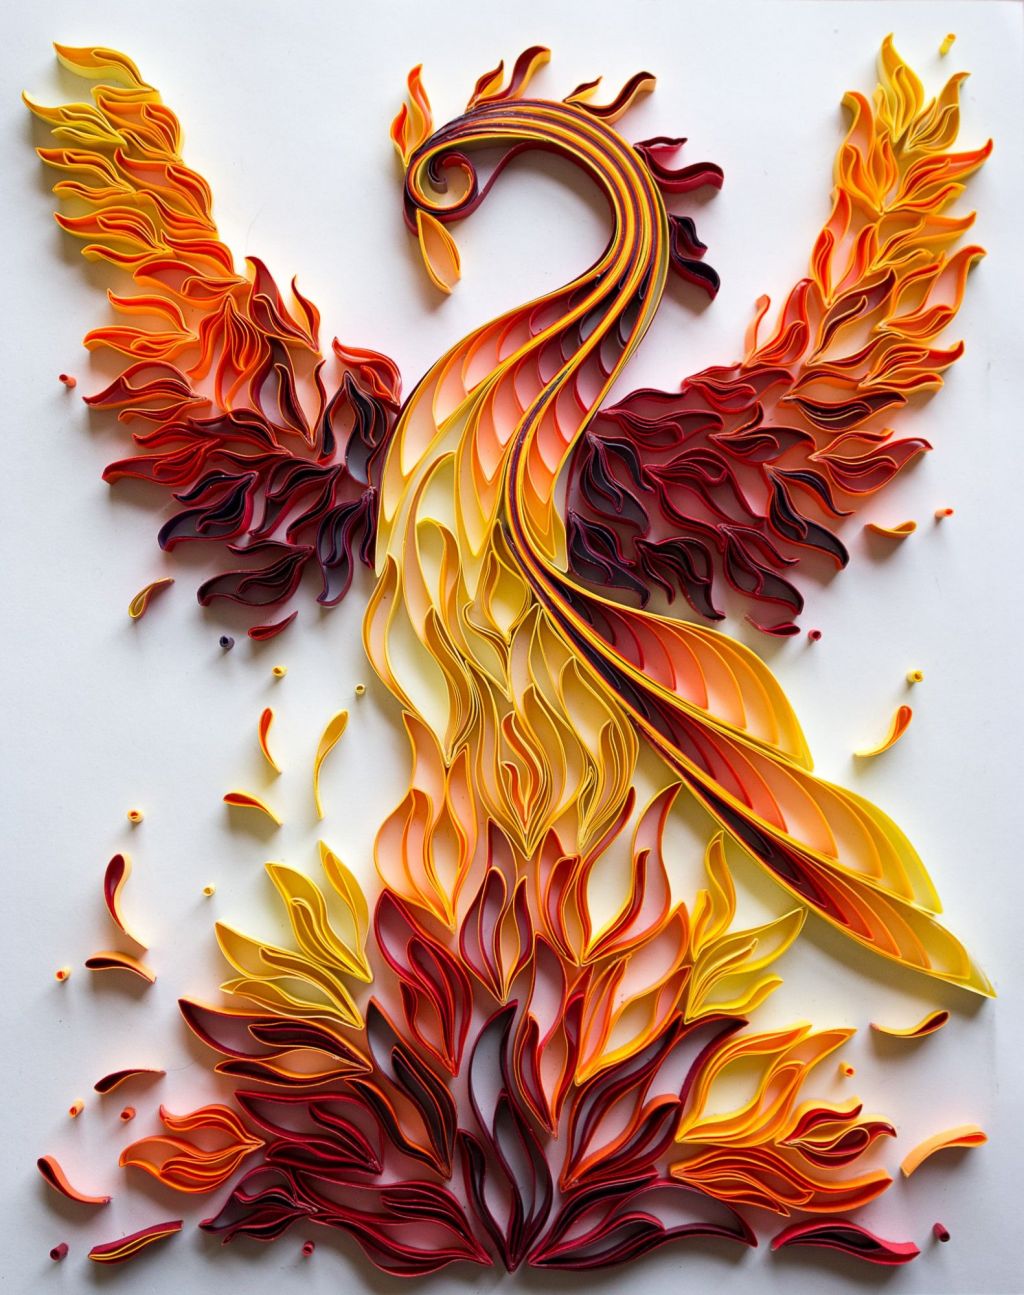
WHAT IS QUILLING?
Quilling is an art form that involves the use of strips of paper that are rolled, shaped, and glued together to create decorative designs. The paper shape is manipulated to create designs on their own or to decorate other objects, such as greetings cards, pictures, boxes, or to make jewelry.
History of Quilling:
The origin of quilling as an art form is traced to Renaissance Europe, when nuns and monks used it to decorate book covers and religious items. The paper most commonly used was strips of paper trimmed from the gilded edges of books.
However, two other competing theories argue that the roots of quilling can be traced to much earlier times. Some researchers say it began in ancient Egypt, while others believe it originated in ancient China following the invention of paper.
Quilling became even more popular in 18th century Europe as gentle ladies of quality (women from the nobility and ruling class) took up the art. It was thought to be one of the few things a lady could do that would not demand too much from her mind or fragile disposition. From then on, quilling spread to the Americas and the rest of the world.
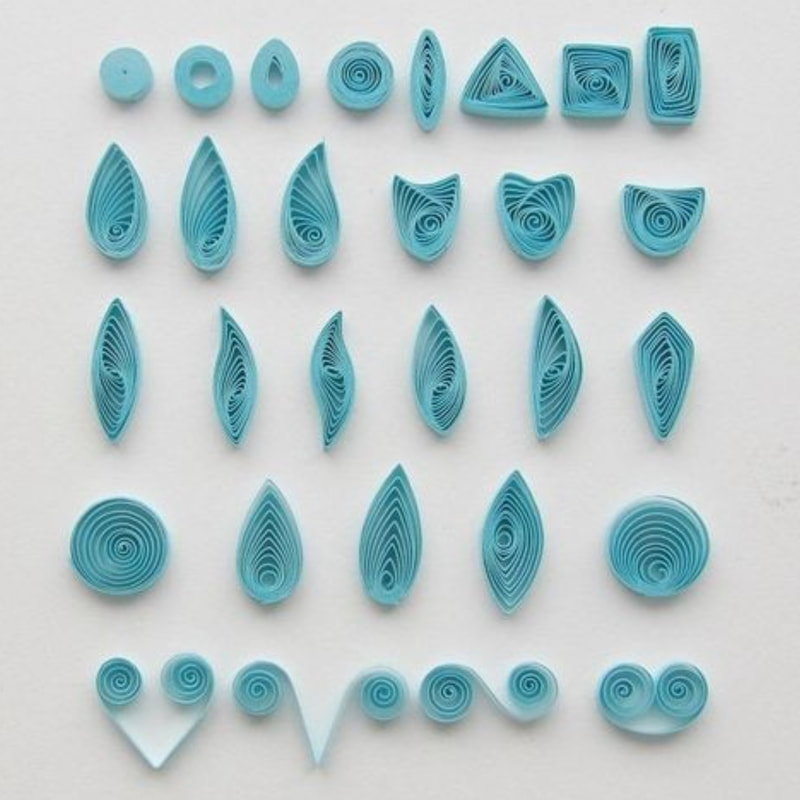
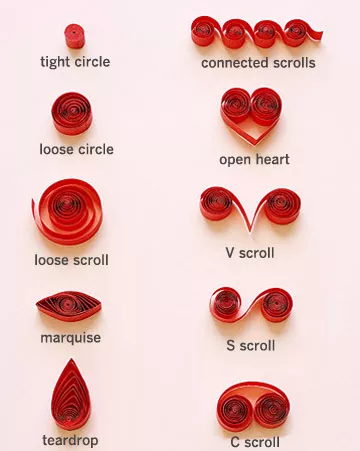
How to: 7 Quilling Techniques
Quilling only requires that you roll strips of paper tightly. By using the slotted tool, you have a good handle on the rolling of the paper and can control the uniformity of the coil. We will begin discussing the various coil types and techniques.
● Tight Coil - A tight coil is just as the name suggests: rolling the paper as tight as possible, allowing no gaps or space between the layers of the paper. Place the end of one strip of paper into the slotted tool and roll as tightly as possible. You want to ensure that the coil stays even and level. Avoid the “tornado” effect, which happens when the coil is too loose or the rolling is uneven. The best part, if you mess up, it’s very easy to start again! Keep the pad of your finger at the top of the slotted tool to help with controlling the roll and preventing the tornado effect.
When you have reached the end of the strip of paper, place just the tiny bit of glue on the end and secure it onto itself. You will need less glue than you think, which is where a precision tip on the glue bottle comes in very handily. Once glued, you have your first tight coil!
● Loose Coil - The loose coil uses the same technique as the tight coil. Begin the same way by placing the end of one strip of paper into the slotted tool and roll as tightly as possible. Again, by using your thumb and forefinger, you can help control the roll and keep it as even as possible.
Once you have rolled the entire strip of paper, remove the slotted tool, and then carefully allow the coil to open up. A good technique is to keep hold of the center of the coil, and then allow the outer rings to loosen. When you’ve loosened the coil to your liking, place a small amount of glue on the end and secure it onto itself.
● Teardrop Coil - The teardrop coil begins the same way as the tight and loose coil. You can have a tight or loose teardrop shape. Roll a strip of paper to your preference (tight or loose), and then when you are ready to glue, use less glue than you think. Note where the seam is, and begin to pinch the coil at the site of the seam. Gently use your fingers to help manipulate the center of the coil downwards, away from the pinched seam, and you’ll have a teardrop-shaped coil.
● Curved Teardrop Coil - The curved teardrop coil is an extension of the teardrop coil. Create a teardrop coil, and once you have the desired teardrop shape, use the end of the slotted tool to help curve the top of the teardrop. Curve just the tip of the teardrop to create a paisley-like shape.
● Marquee - The marquee shape begins with a loose coil. Roll a coil and then open it up to allow it to loosen and have space between its layers. Glue it unto itself (using less glue than you think, of course!) and pinch at both ends. You may need to gently guide the center of the coil to not pinch it. This coil shape will resemble an eye, especially with the center of the coil imitating a pupil and iris.
● Curved Marquee - The curved marquee, also known as the slug, is a variation of the marquee shape. Begin by creating the marquee shape with a loose coil and glue. Pinch both ends, and then use the slotted quilling tool to help curve the tips in opposite directions.
● Square and Diamond - The square and diamond shapes use similar techniques. Create a loose coil, glue, and then pinch each side as you would like the marquee shape. You will end up with four corners, or four pinches. The easiest way to do this is to pinch each side of the coil with both of your hands simultaneously, rotate 90 degrees, and then repeat. The diamond will have a taller shape, whereas the square will have more equal sides
|
|
|
|
|
|
|
|
|
|
|
|
|
|
|
|
|
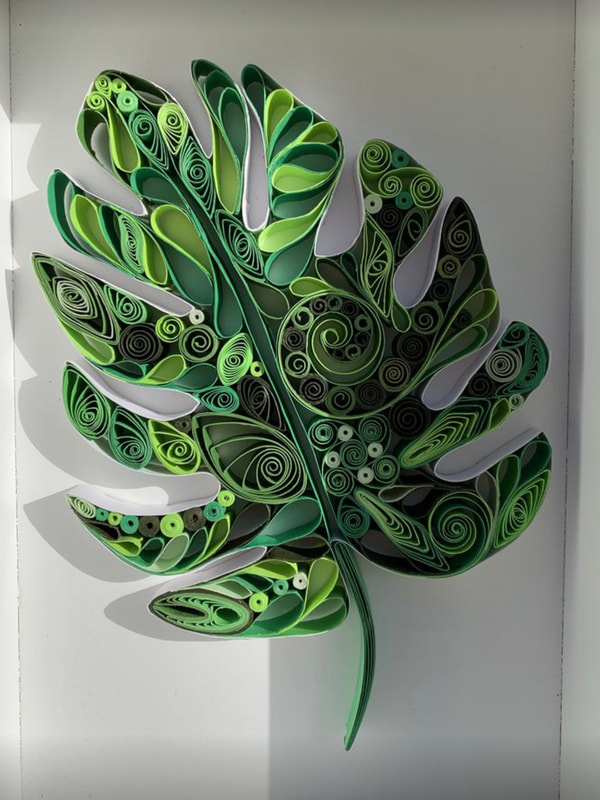
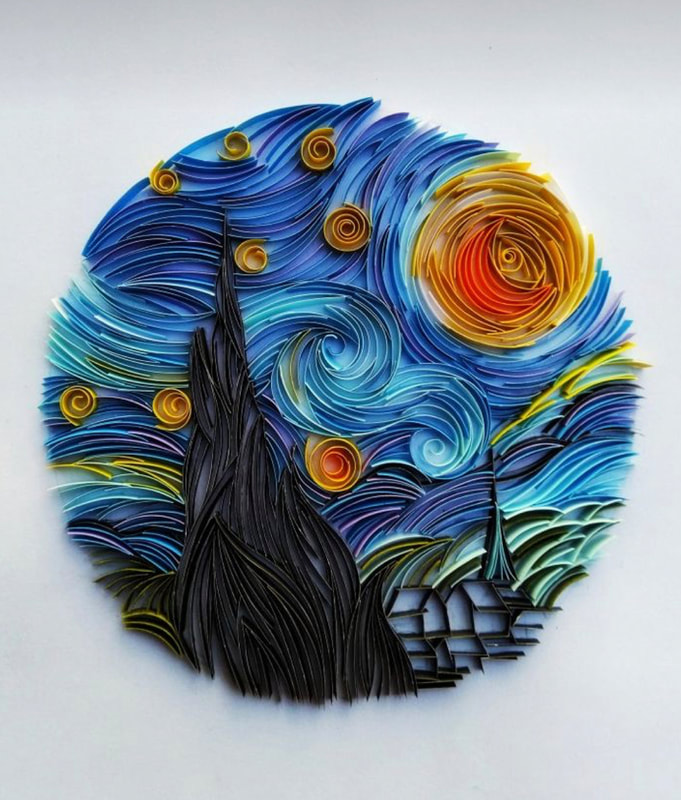
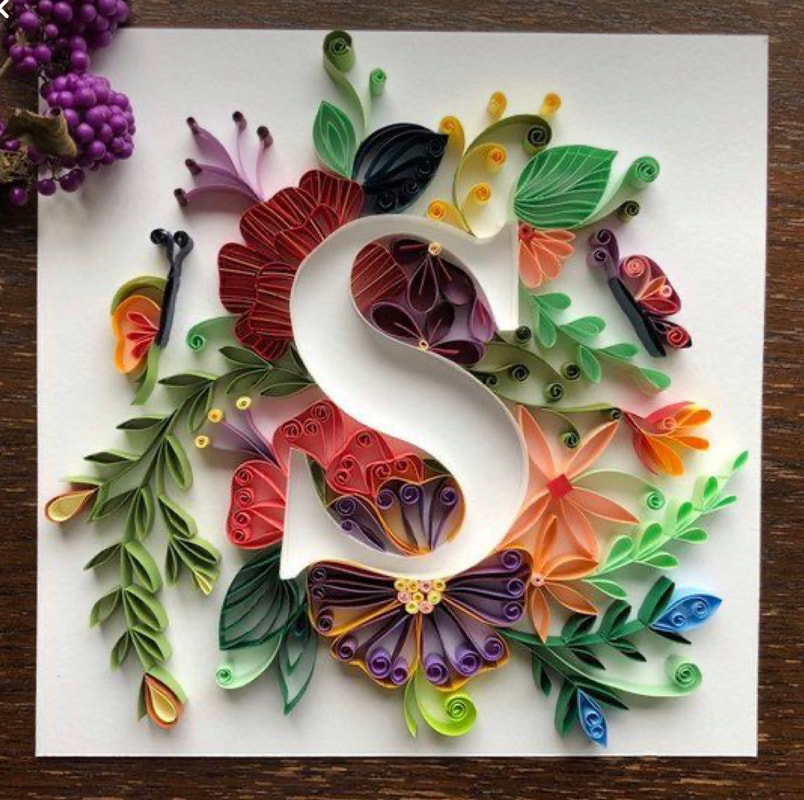
OBJECTIVES:
- Develop fine motor skills
- Get creative with the ancient art of paper quilling.
- Understand paper quilling techniques in order to create a variety of basic shapes
- Know what paper quilling is and a bit of its history
- Be able to arrange quilled pieces into a composition
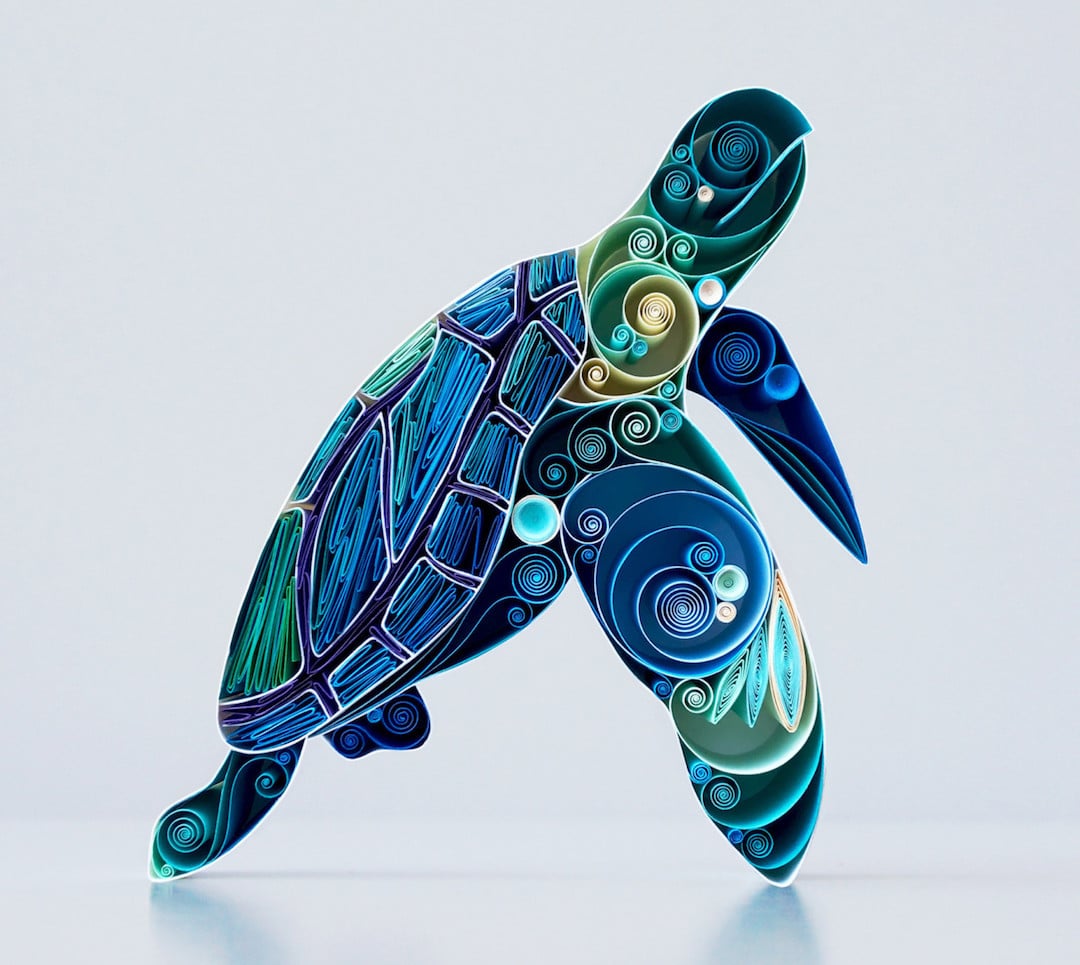
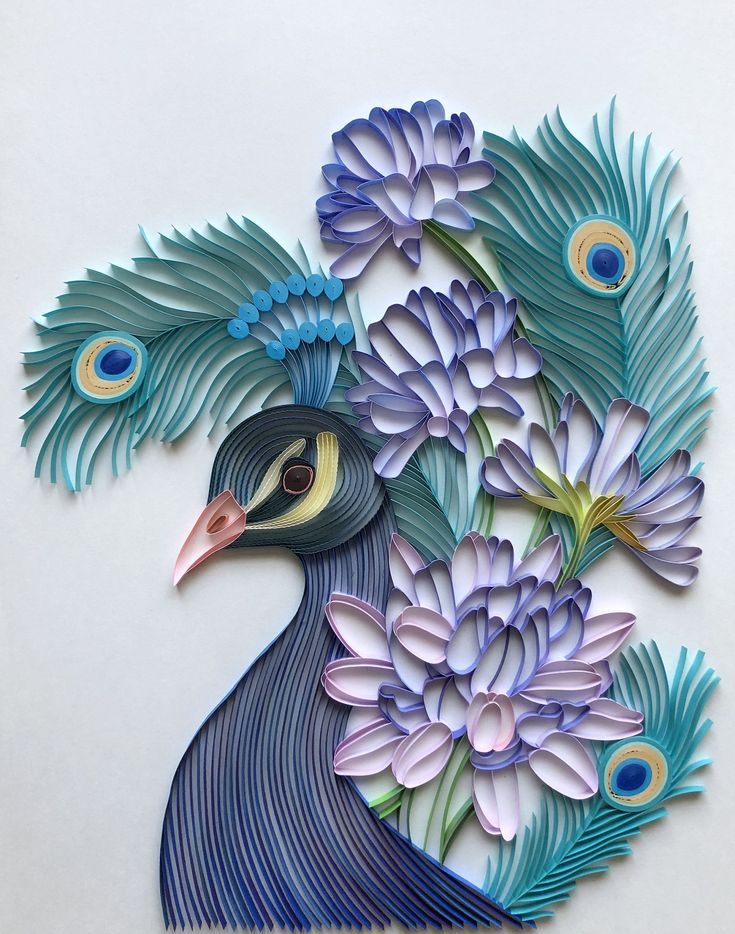
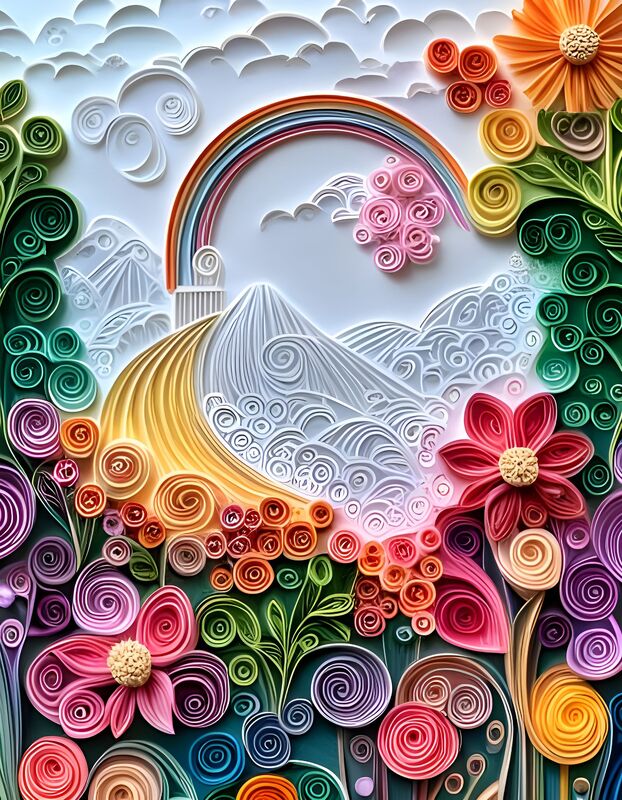
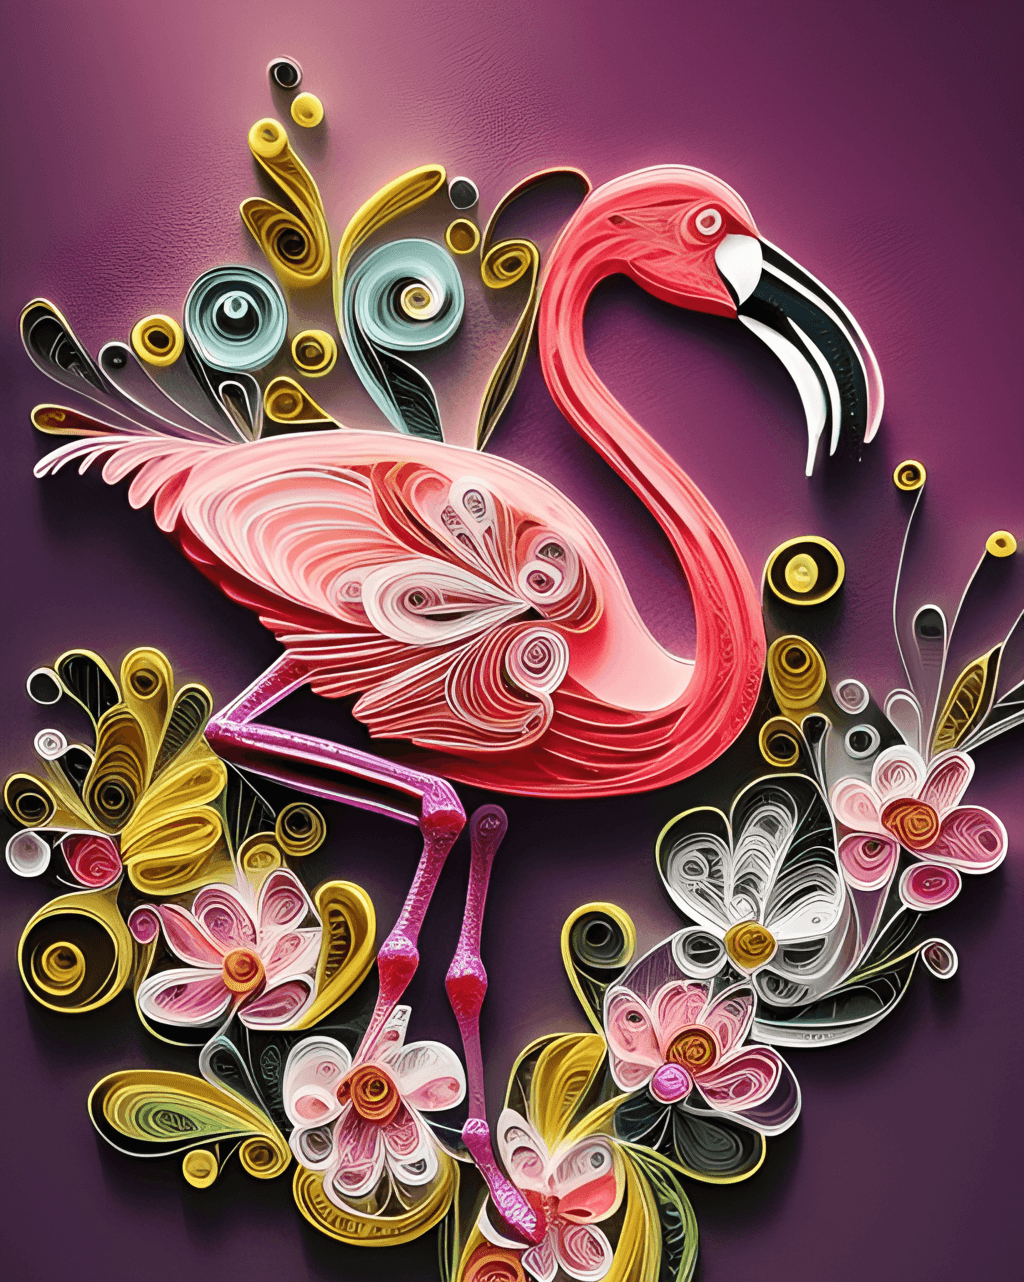
- investigate patterns and forms found in nature..
PART 1: |
WHAT TO DO: |
1. Select background paper; black, white or gray
2. Select strips of paper in the colors needed.
3. Research the various quilling techniques, create your design.
4. You design can be your initial, flower, animal, insect, landscape, or nature.
5. In your sketchbook, create your design and color. Take a photo and submit to Schoology.
6. Complete one design and demonstrate 5 different quilling designs.
PART 2:
For the second part of this project, you are going to create a frame for your paper quilling project.
- Glue your paper to a cardboard. Make sure you have space around your design to add the frame.
- Using Model Magic Modeling clay, create your frame. You can use any of the modeling tools for texture, cut or shape your clay. Work quickly because your clay dries in 24 hours and you will not be able to continue next class.
- Finally, paint your frame!
- Take a photo of your completed project and submit to SCHOOLOGY.
