INTRODUCTION:
Students will learn about the art of David Hockney and create a photo collage inspired by his work using Photoshop.
Students will learn about the art of David Hockney and create a photo collage inspired by his work using Photoshop.
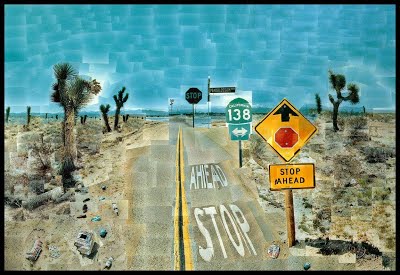
"Pearblossom Highway" 1986
This work was created using over 700 seperate photographs! |
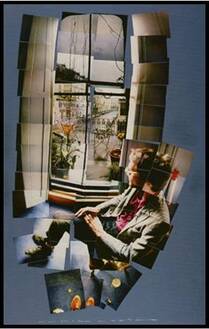
"David Graves Looking at Bayswater London" 1982
|
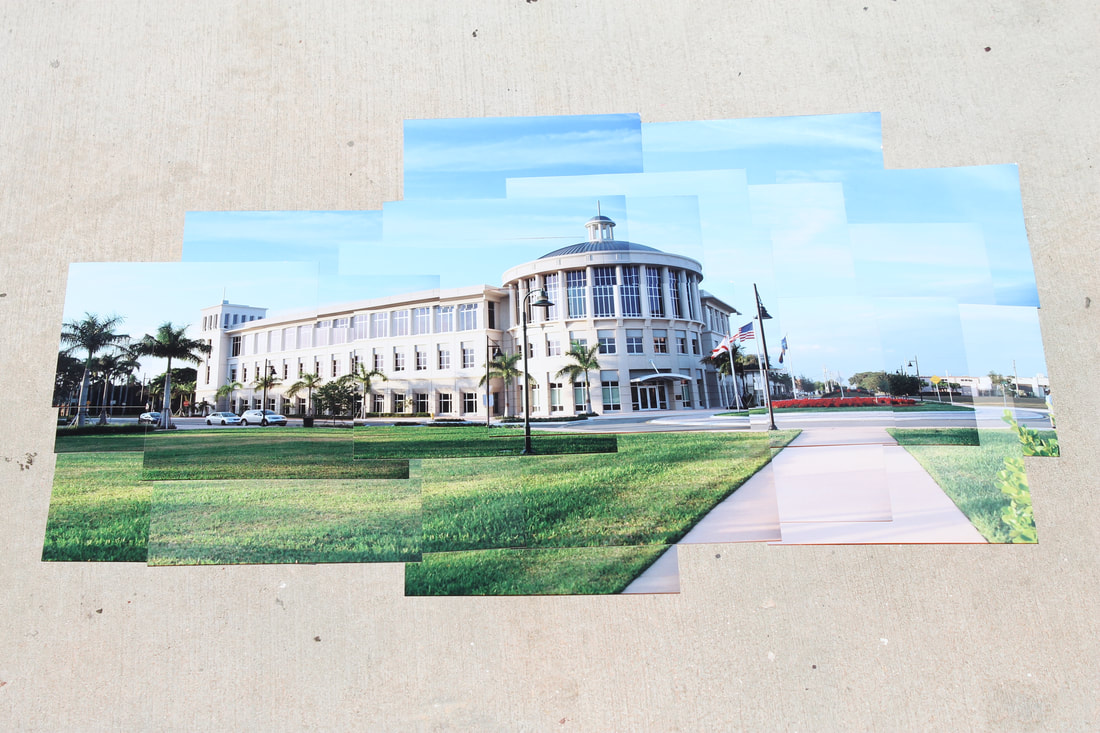
Pearblossom Highway is one of David Hockney’s best known photo-collages. Hockney called his photo- collages “Joiners”. He invented this technique when he took a series of polaroid images and joined them together to form a large picture. He realized that the final collaged image had a better illusion of space when compared to a single photo. He also discovered he could demonstrate the passing of time or telling a story in Joiners, too.
'Pearblossom Highway' shows a crossroads in a very wide open space, which you only get a sense of in the western United States. . . . [The] picture was not just about a crossroads, but about us driving around. I'd had three days of driving and being the passenger. The driver and the passenger see the road in different ways. When you drive you read all the road signs, but when you're the passenger, you don't, you can decide to look where you want. And the picture dealt with that: on the right-hand side of the road it's as if you're the driver, reading traffic signs to tell you what to do and so on, and on the left-hand side it's as if you're a passenger going along the road more slowly, looking all around. So the picture is about driving without the car being in it.' David Hockney
'Pearblossom Highway' shows a crossroads in a very wide open space, which you only get a sense of in the western United States. . . . [The] picture was not just about a crossroads, but about us driving around. I'd had three days of driving and being the passenger. The driver and the passenger see the road in different ways. When you drive you read all the road signs, but when you're the passenger, you don't, you can decide to look where you want. And the picture dealt with that: on the right-hand side of the road it's as if you're the driver, reading traffic signs to tell you what to do and so on, and on the left-hand side it's as if you're a passenger going along the road more slowly, looking all around. So the picture is about driving without the car being in it.' David Hockney
|
|
|
SHOOTING INSTRUCTIONS
|
REQUIREMENTS FOR SHOOTING:
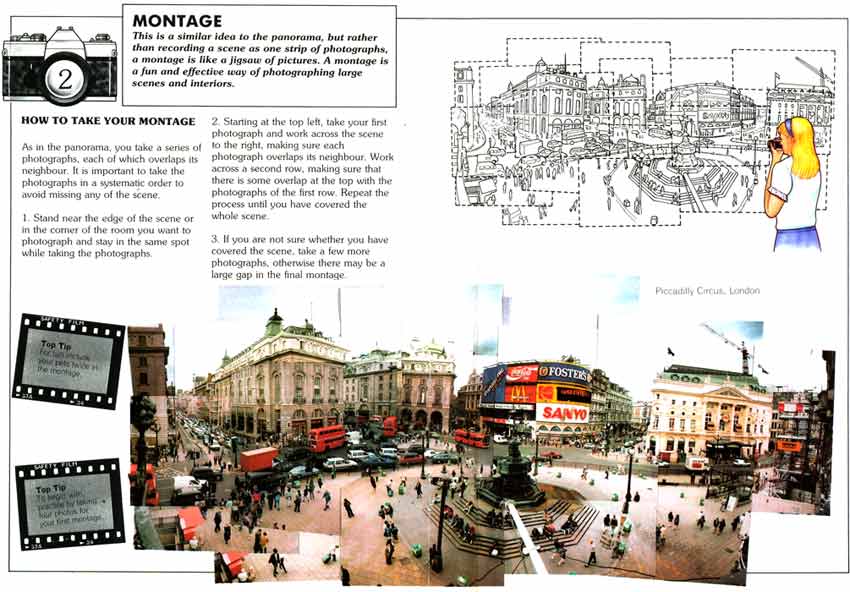
- Choose whatever subject you like- person, place, object, etc... (see ideas below) - Shoot 2 different scenes, with a MINIMUM OF 40+ PHOTOS FOR EACH. (80 TOTAL) More is always better. - ZOOM IN and shoot CLOSE UP shots of different fragments of your subject. - Shoot the entire scene, try shooting a whole row across the top of your subject, then shoot a whole row below that, then below that, etc until you know you've covered youR whole subject. - Each shot should OVERLAP the next, so that you don't have any gaps in your final piece. - Don't move from where you are standing during the entire time you are shooting. Keep your zoom the same as well. - Try tilting your camera left or right as you shoot to get interesting angles. |
IDEAS FOR SUBJECT MATTER
- Choose 2 different subjects to shoot. Shoot a minimum of 40 photos for each. 80 total. More is always better.
- A simple "still-life" of objects you have on you or around you in the classroom... something as simple as your phone on a desk, or a pile of books and papers.
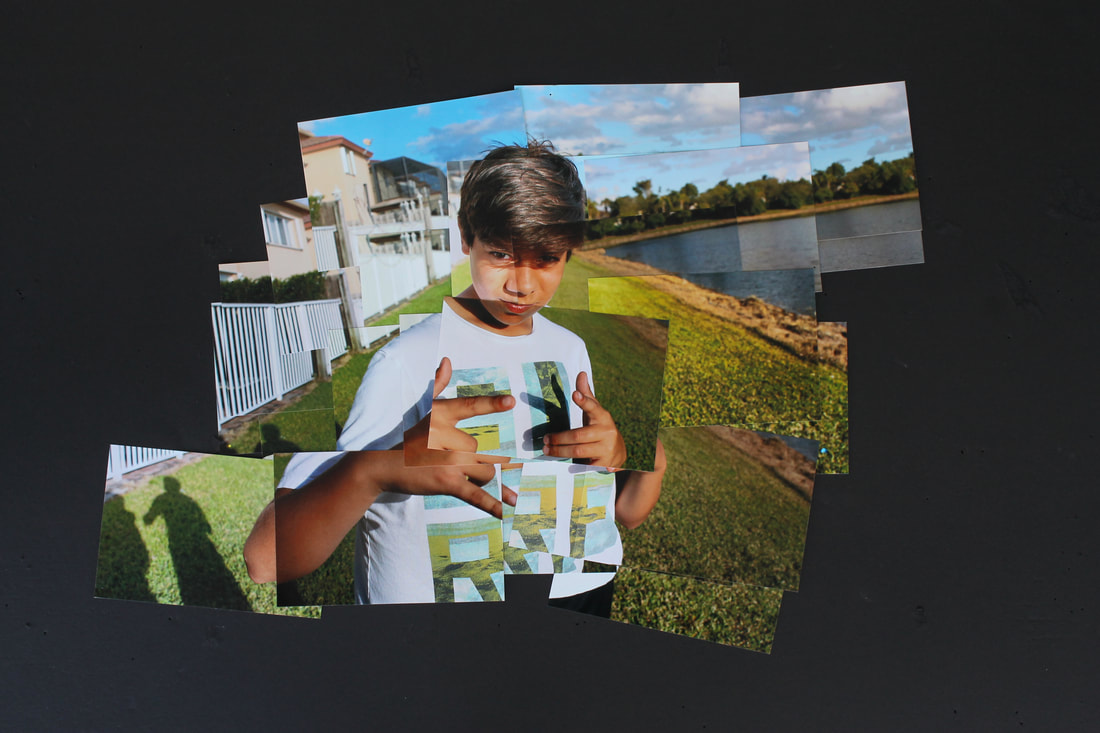
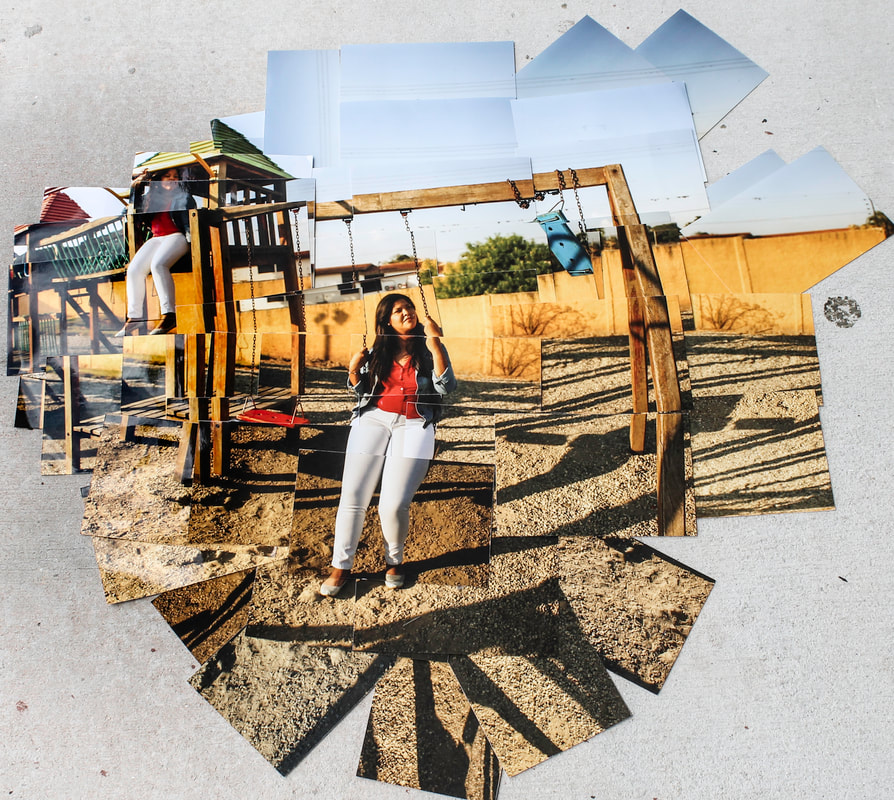
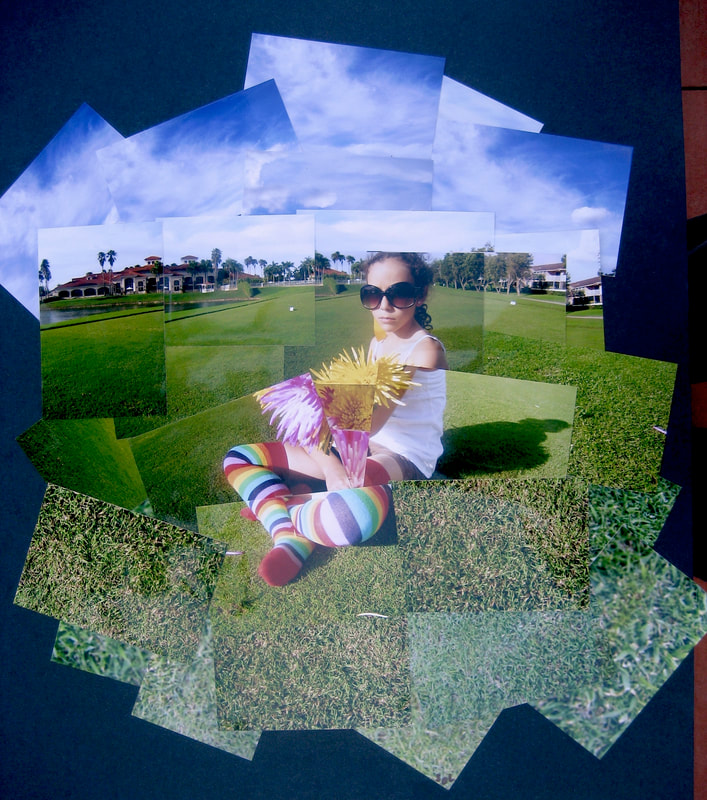
- A group of your friends, posed creatively. They can stay still during the shoot or you can allow slight movement between shots for a more "fragmented" look.
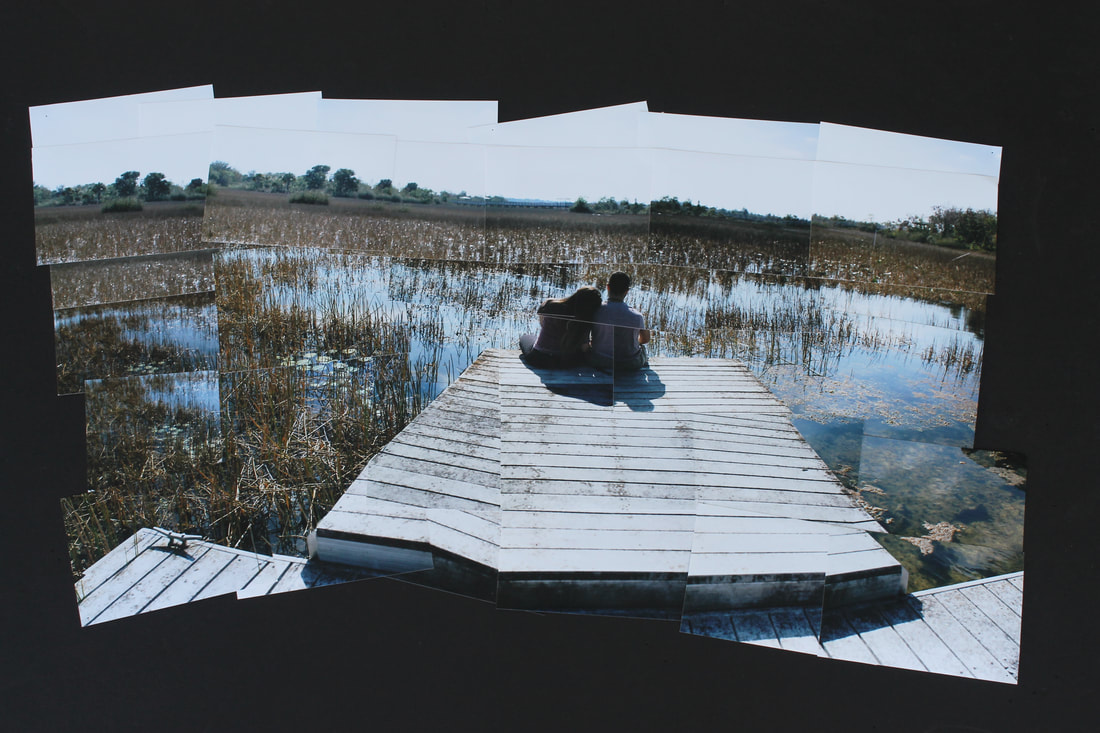
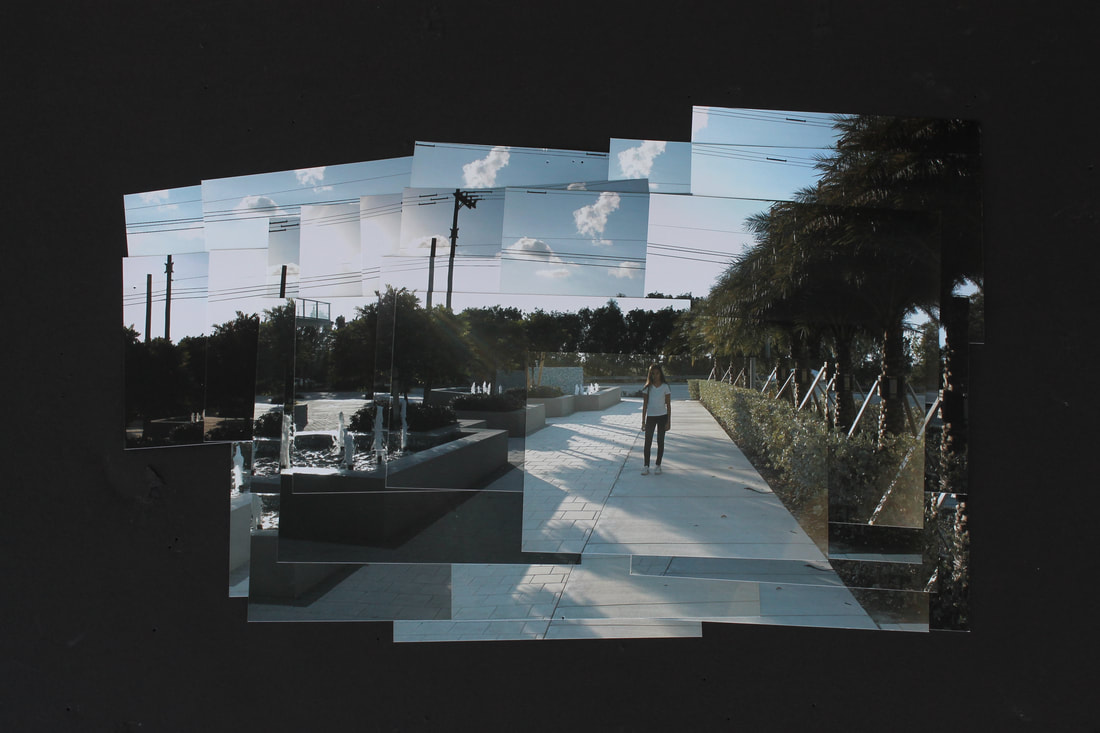
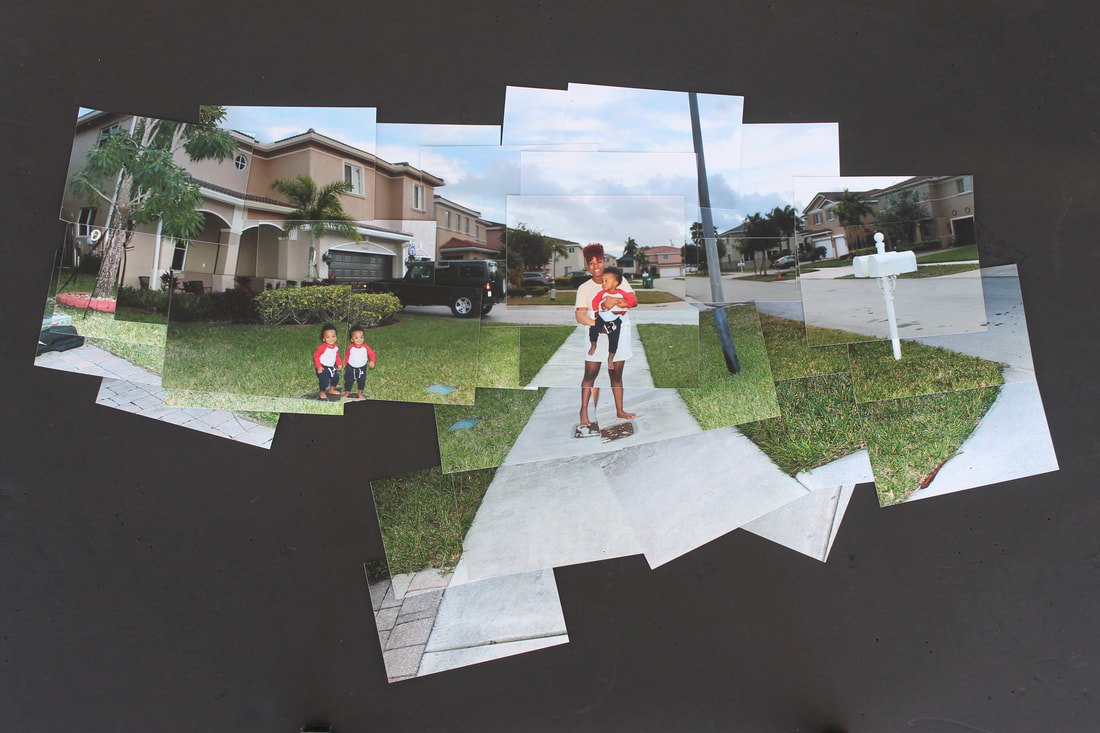
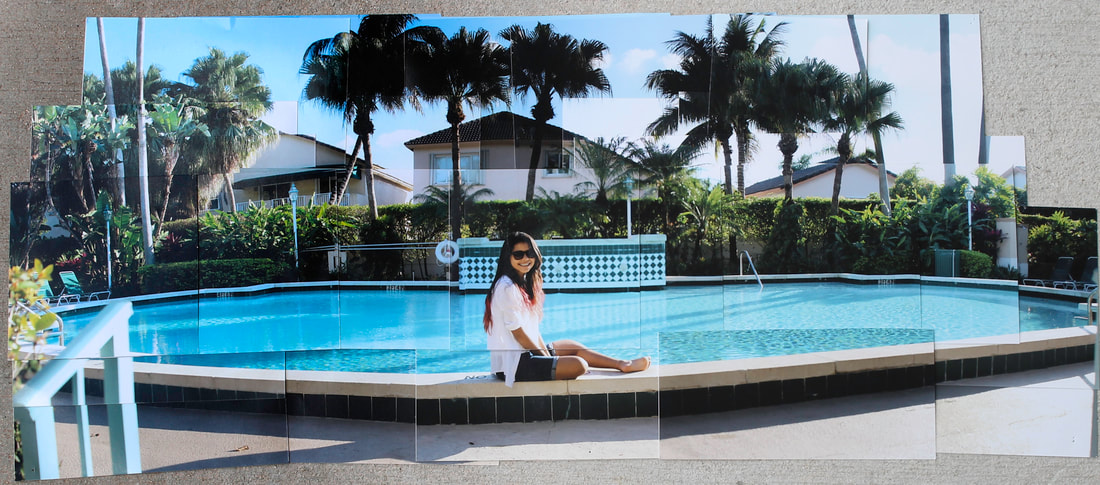
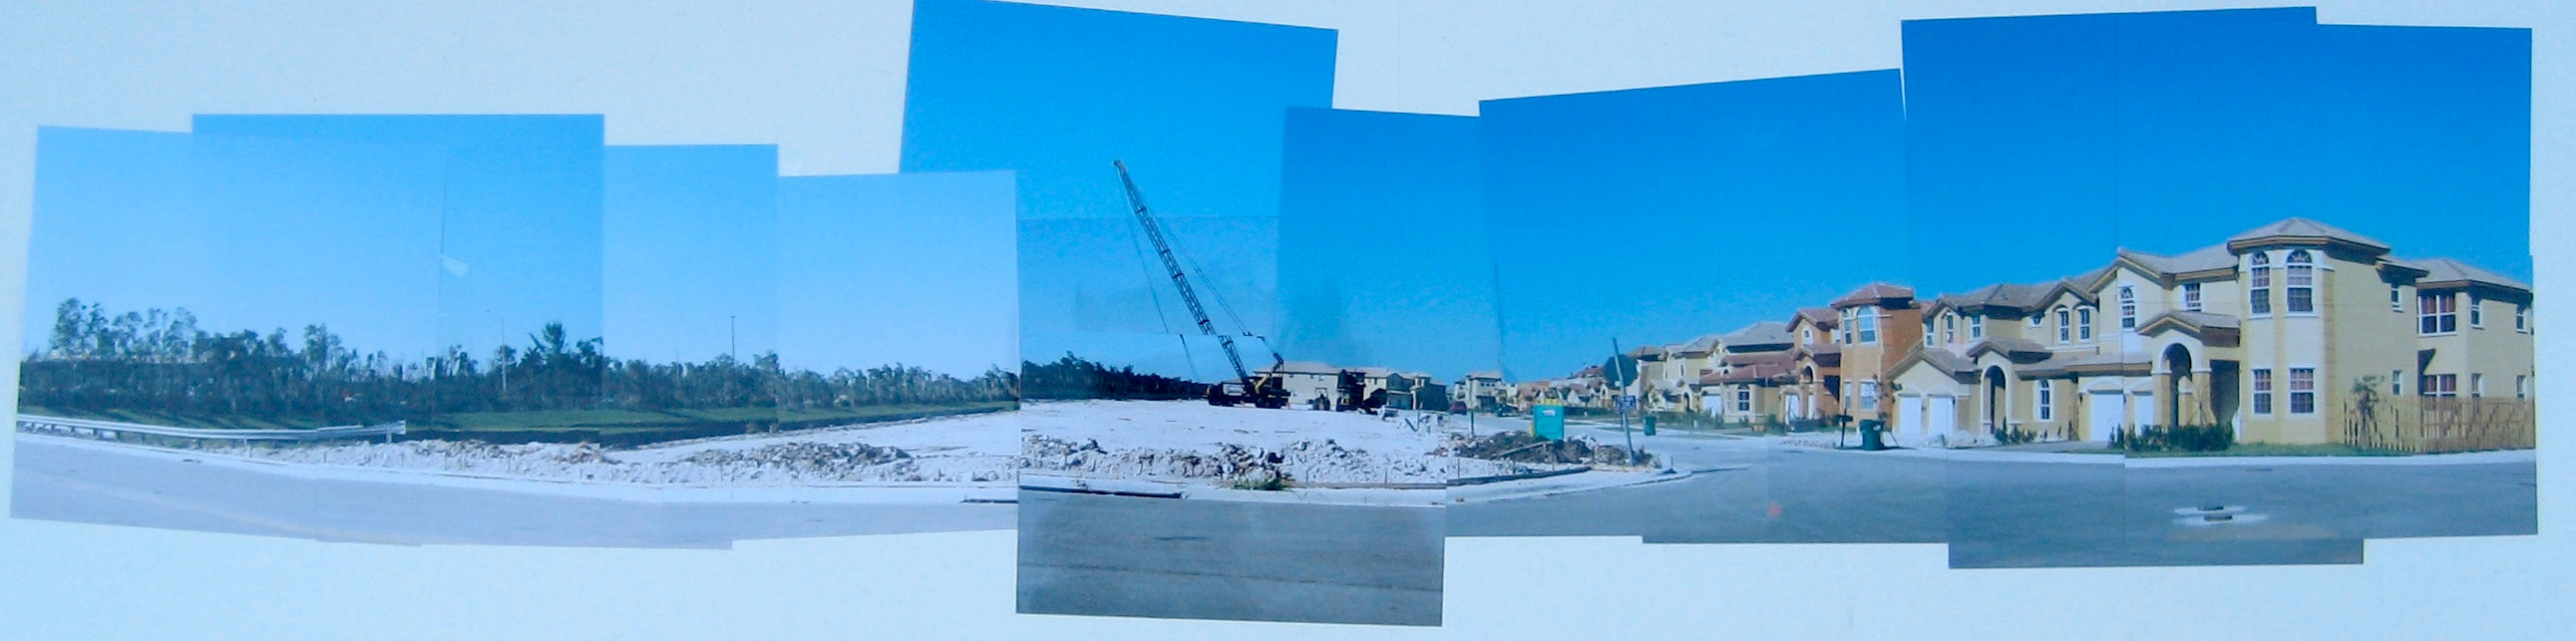
- A sweeping panoramic view of the inside of a building, an outdoors landscape, the front of the school, etc.
- It could be as simple as a park bench, chair or desk.
- Something important to you, or symbolic of something important to you- a musical instrument, art supplies, sports equipment, your car, etc...
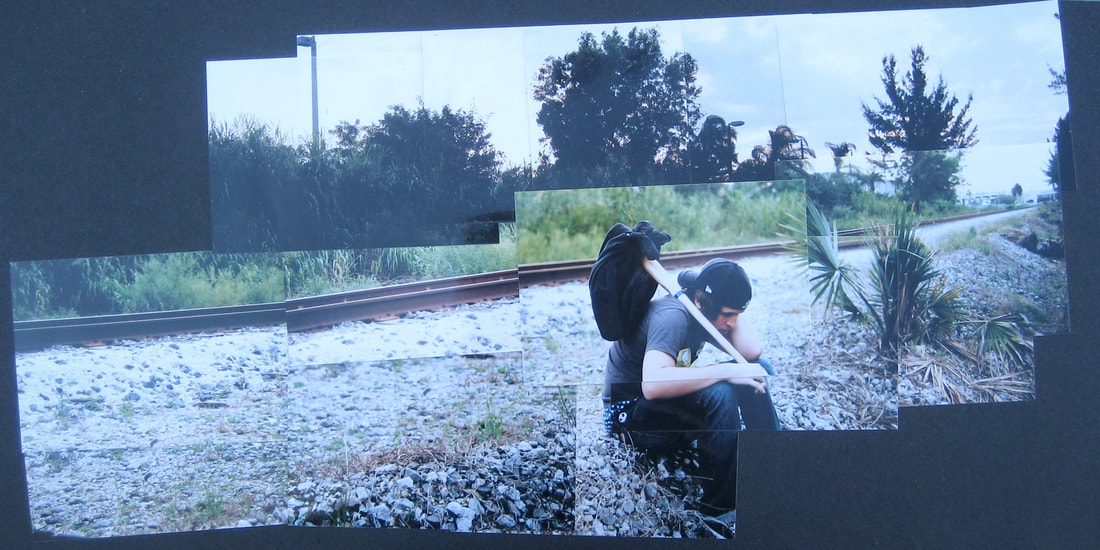
- A portrait of someone working or doing something, allow them to move slightly as you shoot to capture the event unfolding over time...
- Your computer desk or workspace. Try to have your hands or feet sneak into one or two of the photos to show your presence, just as Hockney did in many of his photos.
- A large panoramic view of the classroom, lunchroom, gymnasium, auditorium, etc. Or your messy bedroom if you are shooting at home.
PHOTOSHOP INSTRUCTIONS
|
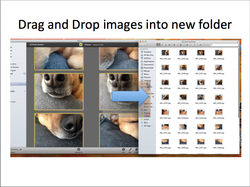
STEP 1: CREATE A FOLDER FOR YOUR PHOTOS! Rename your new folder after the assignment- "Hockney Photos" or something similar.
|

|
STEP 2: CREATE A NEW, BLANK CANVAS IN PHOTOSHOP!
- Create a name for your new file "LastFirstName_Hockney"
- Make your width and height 16 by 20 inches (vertical) or 20 by 16 inches (horizontal). - Make resolution 240 ppi (pixels/inch). - Choose background contents - Transparent - Click OK. |
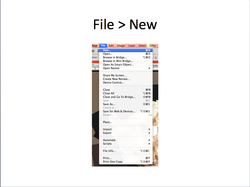
Now open Photoshop.
- Create a new, blank canvas by going to FILE and then choose "New" 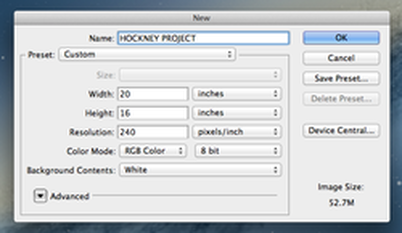
|
STEP 3: DRAG AND DROP YOUR PHOTOS ONTO YOUR CANVAS
|
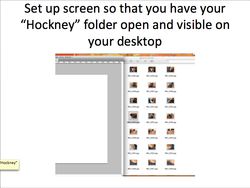
- Set up your screen so that you have your "Hockney" photo folder OPEN and VISIBLE on your desktop behind your photoshop workspace.
- Choose a photo from your Hockney folder and drag and drop it on top of your canvas in Photoshop. 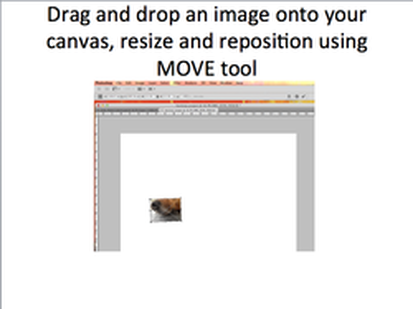
|
- Use your MOVE tool to RESIZE the image, MOVE it and ROTATE it to where you want it.
- Make sure you make it small enough that you can fit all of your other photos on the canvas. -HINT: HOLD DOWN THE SHIFT KEY ON YOUR KEYBOARD WHILE YOU RESIZE YOUR IMAGE!!! This will keep the ratio the same as you re-size, so your image doesn't get "squooshed" or "stretched out" looking! - Click the "Commit" Check Mark in your tool options bar when you are done re-positioning it. |
TROUBLE RE-SIZING? HIT "COMMAND T" or "CTRL T" ON YOUR KEYBOARD
STEP 4: ADD A SHADOW TO YOUR PHOTO!
|
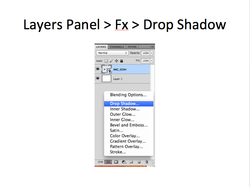
- To make it look more like an actual photo collage, we will add a shadow underneath each image.
- To do this, look in your layers panel and click on the FX button on the bottom. - From the Fx menu, select "Drop Shadow" - You can keep the settings as they are, or if you want to, play around with them to change the size, direction and darkness of your shadow.
- When finished, click OK. |

|
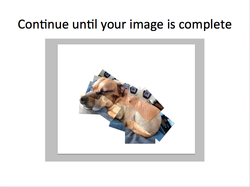
STEP 5: REPEAT STEPS 3 AND 4 WITH ALL OF YOUR OTHER PHOTOS UNTIL YOUR IMAGE IS COMPLETE!
|
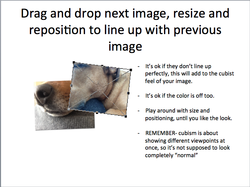
- Now you will select your next image from your Hockney folder and drag and drop it onto your canvas.
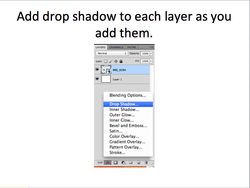
- Pick up your move tool and resize, move and rotate it so that it lines up with the image you placed before it. - It is ok if the color or exposure doesn't match up exactly, it will add to the collage-feel of your piece. HINT: if you shot your photos in a sequential way (in orderly rows for example) it will be much easier to place your photos, just go in order and place each photo next to the one before it. - Remember to add a drop shadow to EVERY PHOTO that you place.
- Keep repeating these steps until your image is complete.
- You do not necessarily need to use ALL of the photos that you took, but you do not want any gaps in your image. - You can include as much or as little of the background as you choose. |
DO YOU NEED TO GO BACK AND RE-ADJUST OTHER LAYERS???
If you need to go back and edit a layer, first SELECT the correct layer from the layers panel.
TIP: to select a layer to move, hold down the command key while you click the layer in your document window.
Then, use "Free Transform" to resize, move or rotate it. Do this by hitting Command T on your keyboard.
You can also REORDER your layers. The layers at the top of your layer panel will cover the ones underneath them. To bring a bottom layer to the top, drag to the top of your layer panel!
STEP 6: RESIZE AND/OR CENTER YOUR COLLAGE ON YOUR CANVAS!
- Once all of your photos are placed, you may need to center your images in the middle of your canvas if they are off to one side, or may need to make the entire collage bigger or smaller to better fit the canvas. To do this, follow these steps:
1. Select all PHOTO layers in your layers panel by clicking the first one, then hold SHIFT key, then click last photo layer. This will highlight them all. (do not select the background layer)
2.) Command T
3.) Hold the SHIFT KEY to resize, and move collage into center of the canvas. Hit CHECKMARK when finished.
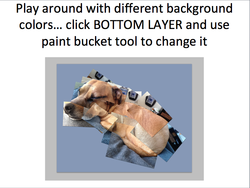
STEP 7: CHANGE YOUR BACKGROUND COLOR!
|
- At this point you may want to experiment a little bit with background colors to see what looks best.
- To do this, scroll down on your layers panel and select your background (bottom-most) layer. - Select a color and use your paint bucket tool to fill with a different color. - You can pick out a color from your photographs to use as your background color if you want.
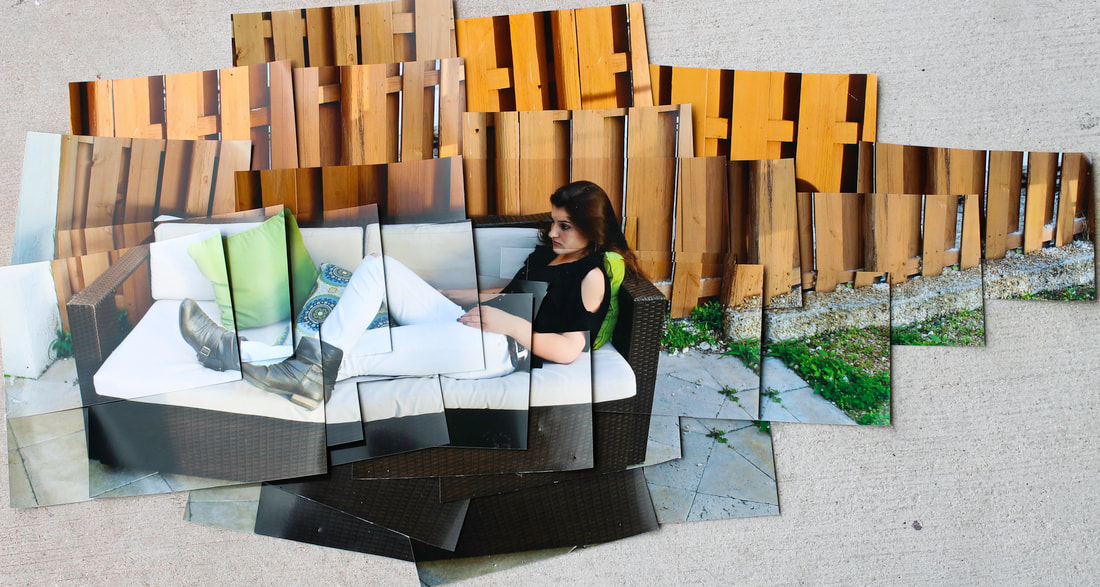
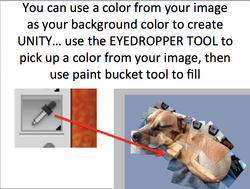
- Sometimes, choosing a background color that is already present in your image can help create UNITY (feeling that everything "goes together") - To do this, pick up your EYEDROPPER tool and click anywhere on your image to choose that color. - Then, switch back to your paint bucket tool to fill the background with that color. - I used a blue shade found in the couch for my background. |
|